Introduction

https://magpi.raspberrypi.com/articles/reaction-game
Quick reflexes can be very useful! Jobs such as goalkeepers or racecar drivers will routinely test and practice their reaction speeds.
Before starting the lesson, play an online game with your classmates. Use this game or get other ideas from here.
Think about: how are these kind of games created? What is being used and how are they programmed?
Task
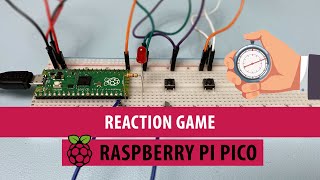
In this project, you will build a quick reaction time game that you can play against friends and family.
In this lesson you will learn about Raspberry Pi and how to wire a circuit and then write a programme to control it. In addition you will learn about variables and how to store them but also get user information. You should pay attention to the small things when dealing with Raspberry Pi. Look at the GPIO Pins and try to understand what they are. Ask the teacher or classmates for help if needed.
You will make a reaction game using this example but try to go beyond - think and code something else, which could be used to test your capabilities.
Process
1. Group discussion.
Discuss the questions below with your friends:
- How quick are you?
- Look at car race videos? How do you think you could handle being under pressure and reacting in a quick way?
- Do you think only boys are quick or can the girls also be racecar drivers?
- What other reaction time games do you know?
- What is used to make a reaction game?
- Have you hear about the Raspberry Pi?
2. Look at the links given in Resources and start thinking about how you could program and how. Do you have an idea already and could do it without help?
3. Go through the steps 1-15 given in "Level 3 - Quick reaction game.pdf" starting from page 7. Test the program every once in a while.
In this lesson you will need to:
- build a circuit
- add jumper wires
- make a connection with GPIO14 and the breadboard
- control the light using Python IDE
- add the element of surprise
- detect buttons
- choose fun player names
4. Try to program the examples given and make them run. If you are up for it, look at the page 22 to get you some ideas on how to advance even more.
Make it interesting and a competition with each other. Let's go!
Conclusion
- You should now have the basic knowledge about the Raspberry Pi and how to wire a circuit; also how to program it for control.
You should now know how to make a reaction game and use different variables.
What next?
Ways you could improve your game:
- Can you put the game into a loop, so that the game repeats?
- Can you add scores for both players that accumulate over a number of rounds and displays the players’ total scores?
- How about adding in a time, to work out how long it took the players to press the button after the LED turned off?
Congratulations!
You have completed the project